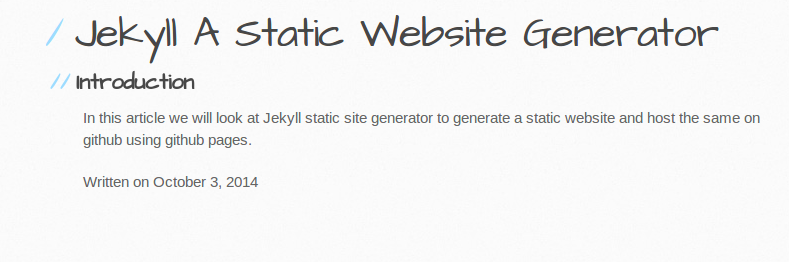
Jekyll A Static Website Generator
03 Oct 2014Introduction
In this article we will look at Jekyll static site generator to generate a static website and host the same on github using github pages.
Background
Jekyll is a simple, blog aware, static site generator.
A static site generator is a utility that generates ready-to-publish static HTML pages from a set of files usually in markdown or HTML which are suitable for deployment directory on any web-server .The blog-aware means that it can support and maintain website with content added in series like that of blogs.
Jekyll is the engine behind GitHub Pages, which enables us to use Jekyll to host the project’s page, blog, or website from GitHub’s servers for free
Github Pages and Jekyll Installation
Let us consider the github project www.github.com/pi19404/pyVision.
Github pages generator gives us the facility to create a website for the project using one of the standard defined themes .This is the easiest way to start a project without having to worry about the HTML themes and CSS files etc and just focus on content writing.
To generate a static webpage of the project go to project settings on github.com
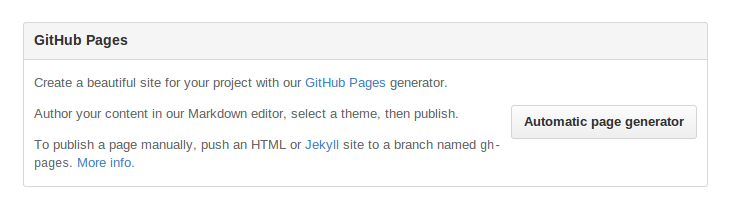 Click on the Automatic page generator options
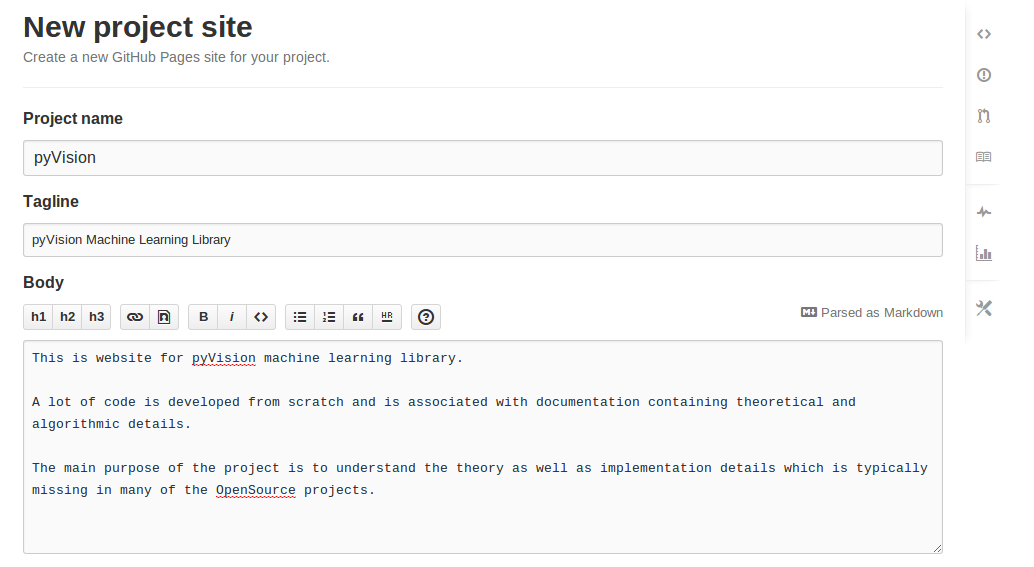
This will provide you with a markdown editor where you can enter the contents for the main page of the website.
Enter the name ,content and other details and click on “Continue to Layouts Button” to proceed to HTML theme selection
 Select the desired theme and click on “Publish Page” button to complete the process
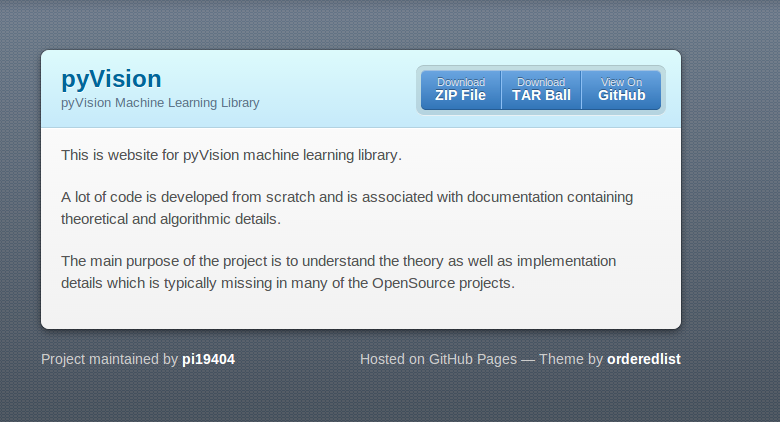 This will lead to github servers hosting the created website on “http://pi19404.github.io/pyVision”
now we are ready to modify and edit the website.The sources of the website are also stored in github repository of the project in the gh-pages branch.
Thus all we have to do to access the sources is to checkout the gh-pages branch and start modifying content on local server and then push changes onto remote github repository.The github servers will regenerated the website and latest changes will be reflected on your website.
The same process can be used to maintain blogs,post or any other content of the website.
Every GitHub Page is run through Jekyll when you push content to gh-pages branch within your repository
Installing Jekyll
Though Jekyll installation on local PC is not necessary.It can be installed in order to preview the website and troubleshoot issues or bugs before pushing the site on GitHub Pages.
- Ruby - Jekyll requires the Ruby version 1.9.3 or higher.
- To install ruby easiest way is to download ruby install managers like “rvm - The Ruby Version Manager”
- Detailed installation instruction for
rvmcan be found at http://rvm.io/rvm/install or install the software from package manager like synaptic - To install Ruby :
rvm install 2.5.2 - This will download the ruby 2.5.2 sources and perform compilation and deployment at “/usr/share/ruby-rvm/”
- In some cases you many encounter compilation issues due to outdated version of OpenSSL,in which case install the openssl from rvm tool :
rvm pkg install openssl - This will install the openssl packaged within the rvm installation directory
-
While compiling ruby we can given commandline arguments so that it referes the openSSL package from the rvm install directory and not default system path :
rvm install 2.5.2 --with-openssl-dir=/usr/share/ruby-rvm/usr
- Bundler - Bundler is a package manager ,This can be installed as easily
gem install jekyll bundler
 **gem install bundler**  - Jekyll installation
 - Clone the sites repository on the local machine
 - Change the branch to gh-pages if you have created a project website
 - Create a file called GemFile in the directory with the following content
                 source 'https://rubygems.org'
                 gem 'github-pages'
 - Jekyll requires  a JavaScript runtime . You can install `xecjs` and `therubyracer gems`, or install `nodej` .
 - Run the command : `bundle install` for installing Jekyll
 - To ensure that local development environment is same as that of github regularily update the local environment

   `bundle update github-pages `
- Running Jekyll :
bundle exec jekyll serveThe website is accessible for preview at : http://localhost:4000
Layouts and Website Template
Front-matter is just a set of metadata, delineated by three dashes which takes for form of valid YAML content.Any file that contains a front matter block will be processed by Jekyll as a special file. Thus .Jekyll requires that Markdown files have front-matter defined at the top of every file.The front matter can be included in top of markdown or HTML files.
Between the dashed lines you can set predefined variables ( title,layout) or set custom used defined variables.
The present article was written using Markdown syntax and frontmatter included on top of the files was
---
layout: post
title: Jekyll A Static Website Generator
---
Introduction
-------------
In this article we will look at **Jekyll** static site generator to generate a static website and host the same on **github**  using github pages.
The layout tag specifies the template to be used for generating posts.The templates can be makrdown containing HTML contents.
Jekyll uses the Liquid template system .The variables defined in front matter and page contents can be accessed accessed using the Liquid tags both within the files as well as any layouts that page of post relies on.
Let us look at the template for post called post.html and how contents are incorporated using Liquid markup language
--- layout: default ---{{ page.title }}
{{ content }}'Written on {{ page.date | date: "%B %e, %Y" }}
Thus when a post is created using the template,then the title specified in the frontmatter is the post is accessed via variable page.title.The page content is accessed via variable content. Jekyll provides numerous predefined global variables that you can set in the front matter of a page or post.
Information on some of them can be found at Frontmatter Predefined variables
The rendered html output for above file is
we have seen that in post.html file we have included frontmatter “layout”.This enables us to include the contents of the post.html file into another files as its contents using Liquid markup language.
This enables us to maintain layout and content files separately and we can change the site layout whenever required without making any changes to the content files.The frontmatter predefined variable provides a lot of flexibility in how we can define complex layouts and themes for the website.
There is a index.html file in the project repository that is auto generated by github pages. We modify this file so that it can be used as a base template for all the pages on the website.
we create a _layouts directory in the root folder of the repository.This directory contains all the files that can be accessed by defining the layout variable in the frontmatter of the files.If the layout variable is assigned values post then the file post.html in the _layout directory will be accessed.
we create a file default.html.The default.html file contains the html headers,javascript,stylesheets etc as well as contents to be included in header and footer of pages. Again Liquid markup language is used to specify where the content is be be included
pyVision by pi19404
........
{{ content }}
If the file is markdown file then all its contents are inserted in place of contents tag.If the file is HTML then the declaration inside section tag of class content is inserted in place of contents tag.All the pages of the website including the main page index.html contains frontmatter are designed so that generated contents are inserted within default layout.
Posting Blog
All the blog posts reside in the _posts directory.The format of filename is year-month-day-title.ext.This will generate the blogs posts in year/month/day directory of static website.
The blog posts can be html or markdown .
Let us create a blog post called 2014-10-03-Jekyll.md
---
layout: post
title: Jekyll A Static Website Generator
---

Introduction
-------------
In this article we will look at **Jekyll** static site generator to generate a static website and host the same on **github**  using github pages.
..........
Now we need to provide links to access the blog content from the main page of website.This is done using Jekyll variables and adding the below content in the index.html page
--- layout: default ---.......
- Blog Posts -{{ site.url }}
{{% for post in site.posts %}}- {{% endfor %}}
{{ post.title }}
now we launch the website on local machine by executing command
bundle exec jekyll serve

now we push the repository onto github
git push origin gh-pages
access the webpage and observe the similar output as on local server
The markdown used is called GitHub Flavored Markdown,It is different from standard markdown language.The following like gives the difference and highlights the features of Github Flavored markdown language
now that we have created the html,say we want to use the html content on other sites like codeproject or blogger.we can access the html at _site/posts/2013/10/03/Jekyll.html.
we can copy the relevant sections of html file and with slight modifications make it compatible with other websites.
Code
The pyVision repository can be found at [www.github.com/pi19404/pyvision](www.github.com/pi19404/pyvision) and website can be seen at pyvision
All the files used in the preset article can be found in the gh-pages branch of the repository.
The file for the present article can be found at _posts/2014-10-03-Jekyll.md
The source files in gh-pages branch of the repository files can also be downloaded from
- Download pyVision.rar - 1.5 MB
- Download pyVision.zip - 1.6 MB
- Alternate link